Our world has become more and more digital. We watch digital movies, listen to digital music, and many of the documents that used to be paper-based are now sent and received in digital form as PDF files. Do you ever find yourself needing to print, sign, scan, or send these documents? If so, there are easy ways to do this using your iPhone or iPad.
I’ll cover two different scenarios in this article:
- Email: you receive a PDF file in email that you need to sign and return.
- Paper: you have a paper document that you need to sign and then email somewhere.
Note: You’ll be using the built-in Markup tools in these examples. These tools can do much more than I cover here and are supported in many apps. Feel free to experiment as you can always discard your changes. I will cover these tools in more detail in an upcoming article.
If you receive an email with an attached PDF form that you need to fill out or sign and then send back, there is a simple way to handle this.
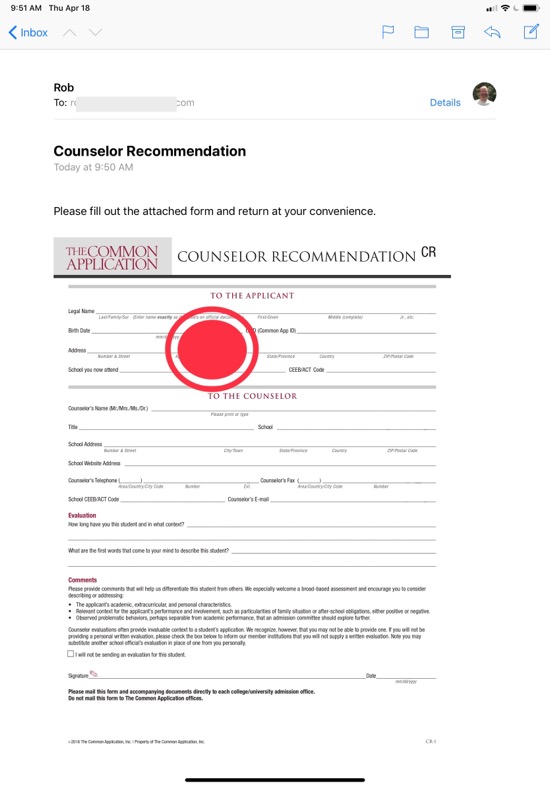
Open the email containing the form and tap the form to open it. Sometimes attachments are shown as an icon:

… and other times they are shown with the first page as a preview:
Fill It Out
If the form has fields that need to be filled out, just tap in any field and use the keyboard to enter the information. If there is a checkbox, just tap the box to fill it in.
Note: If the form has not been prepared properly by the sender, then this technique won’t work. I’ll cover other ways to add text to PDFs in an upcoming article.

Sign It
To sign the form, tap the Mark Up button in the toolbar in the upper right corner to bring up the mark-up tools. (Note: if the toolbar is hidden, tap on the form to show it).

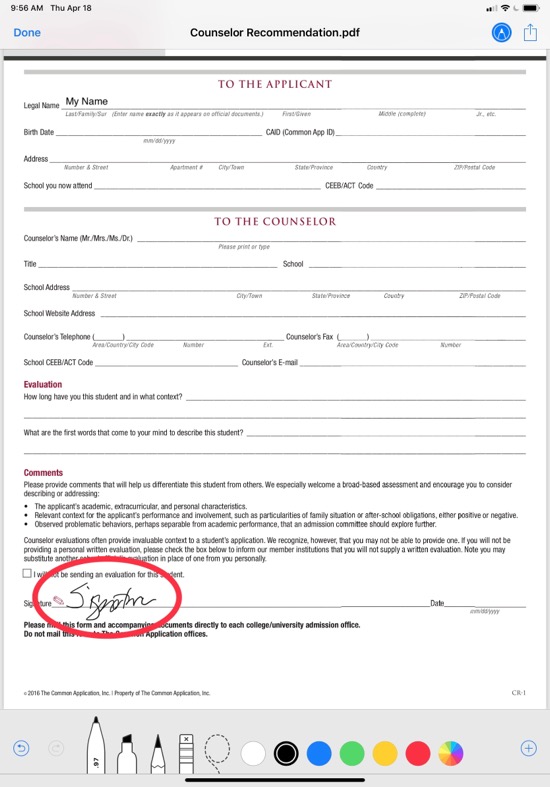
Quick Signature
To quickly sign the form, use your finger or the Apple Pencil to sign the form:
Saved Signatures
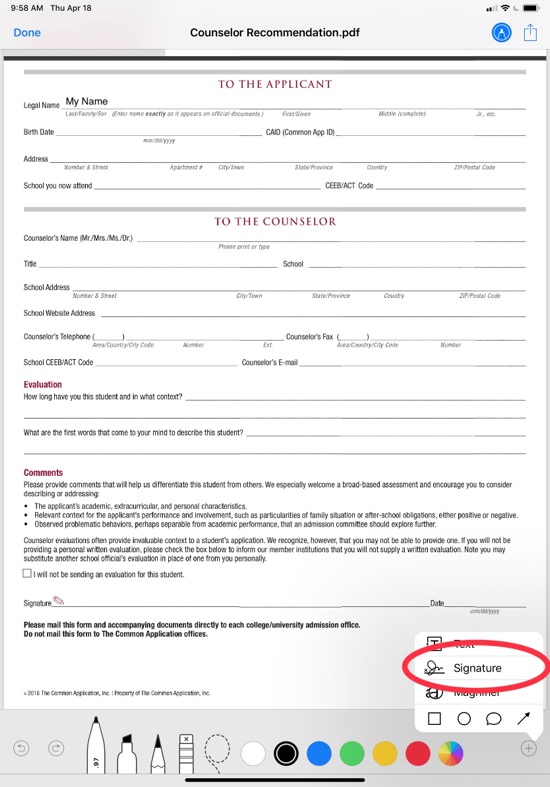
You can also choose to save a signature so that it’s even quicker to sign documents in the future.
Tap + and choose Signature:
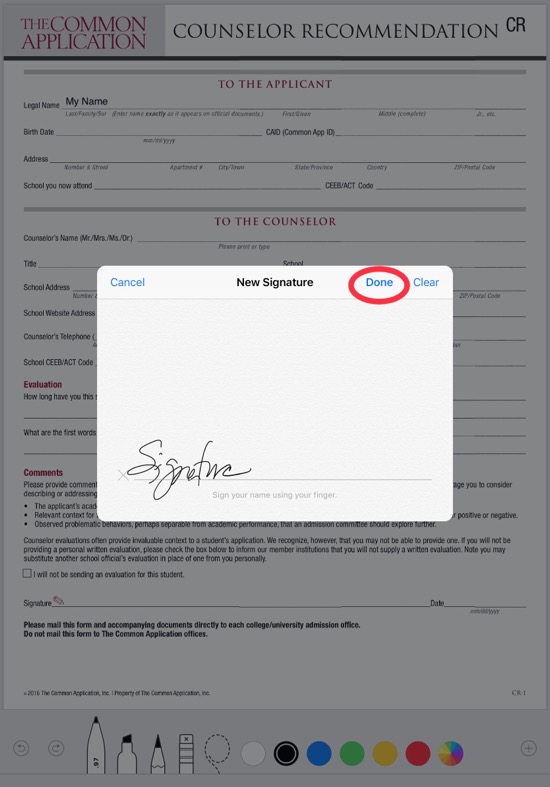
If you’ve never created a signature before, use your finger or the Apple Pencil to sign where indicated, and then tap Done. This will insert your signature onto the form and save it for use again later:
If you have already saved a signature, just tap it to insert it onto the form:

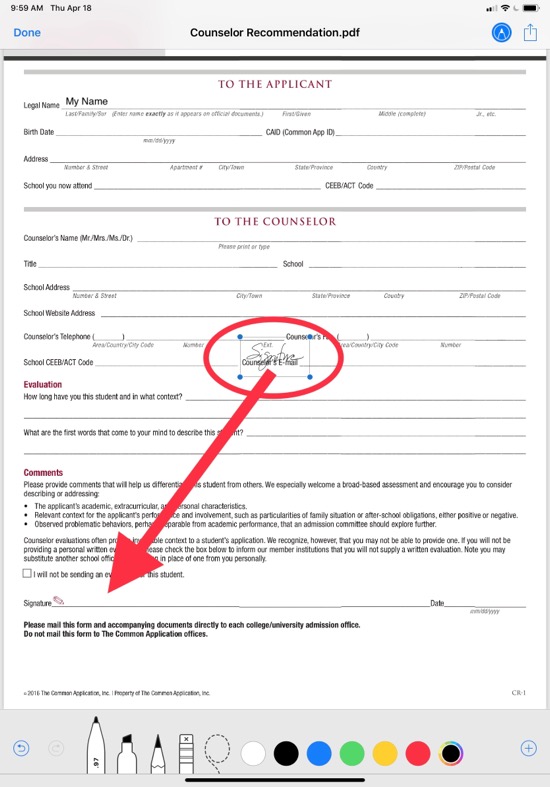
Once your signature is inserted, move it around with your finger, and change the size using the blue dots:
Undo
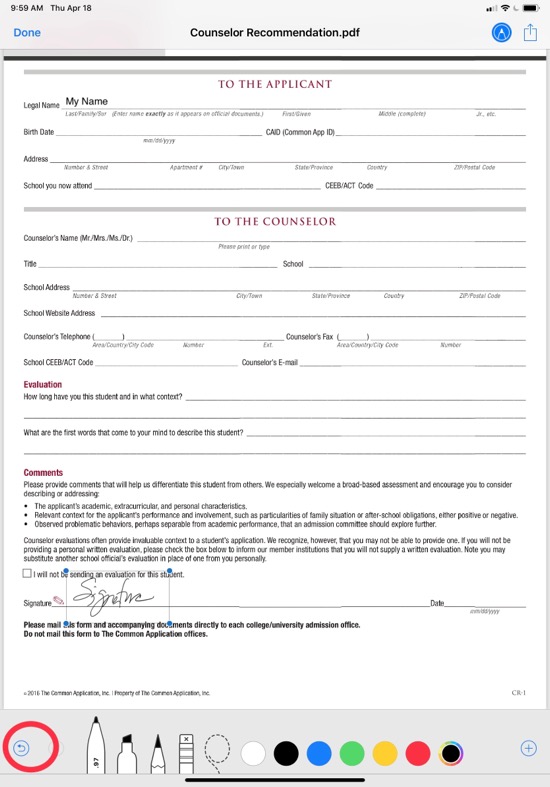
If you make an error while marking up the form, just tap the Undo button. You can tap it several times to undo several mistakes:
Send It
Once you’ve finished with the form and are ready to send it, tap Done in the upper left.
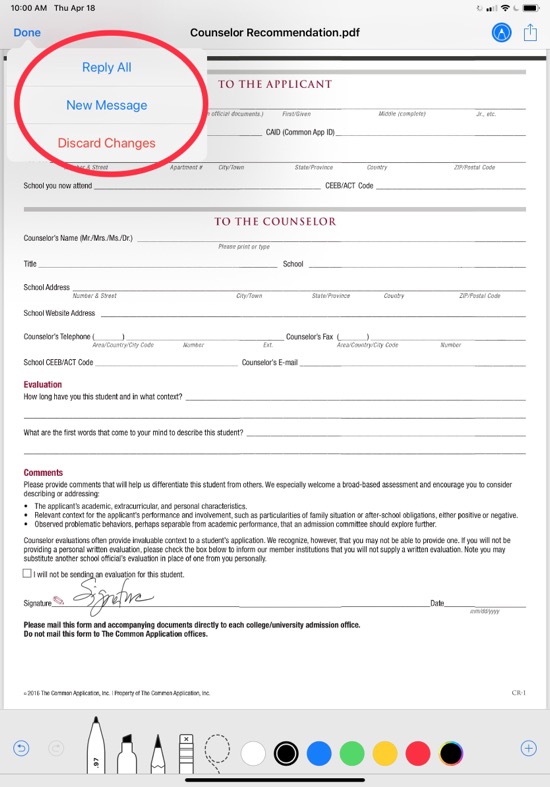
You can choose to Reply All, which will prepare a reply to the email and attach the form with your changes. You will have the opportunity to add more to the email before you send it:
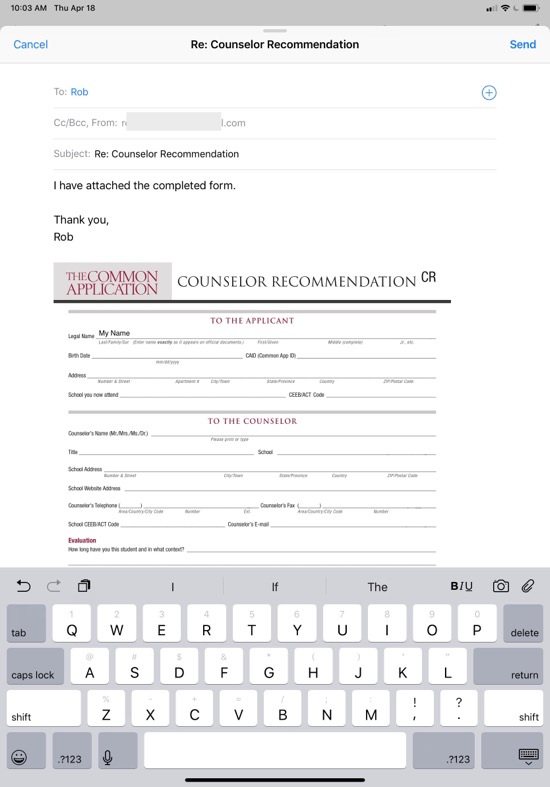
Or, you can choose to create a New Message, which will attach your edited form to a new email message, to which you will add the recipient, subject, and any other text.
If you don’t want to continue, just tap Discard Changes and you’ll be taken back to the original email message.
Paper
Many times you’ll have a paper document that you need to send via email. There is a simple way to create your own PDF version of the paper document and email it.
Scan It
The Notes app has a built-in document scanner that makes it easy to scan a paper document to create a PDF, and then send it through email.
Start the Notes app and tap New Note:
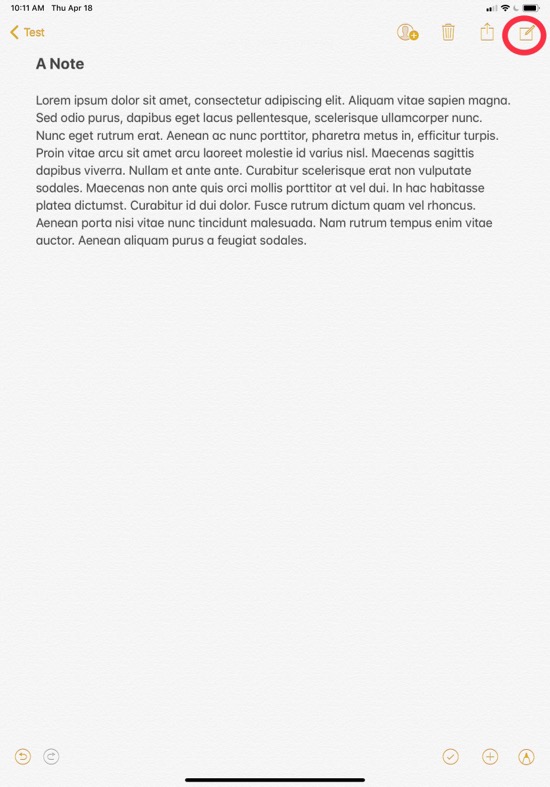
Tap the + button and choose Scan Documents:

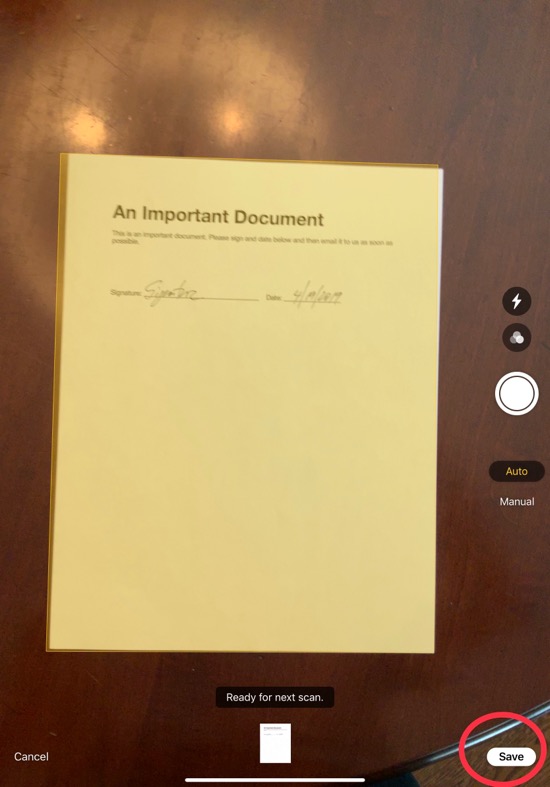
Position your device so that the document is fully visible and hold steady. The document will be automatically scanned after a moment. If it isn’t, tap the Scan Button to manually take the scan.

If you have more than one page, keep taking scans in the same manner and each page will all be added to the same document. Once you’ve finished, tap Save:
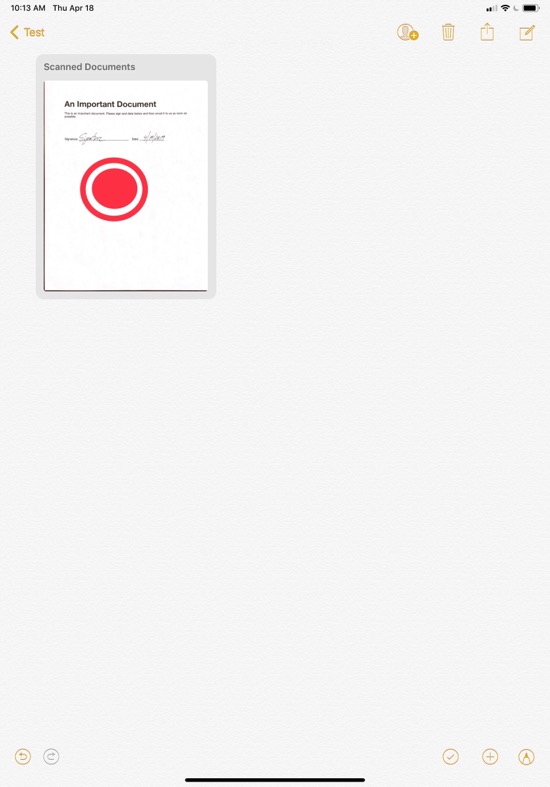
The scanned document will then be added to the note:

This note is just like any other so you can add your own text and other items if you’d like.
Send It
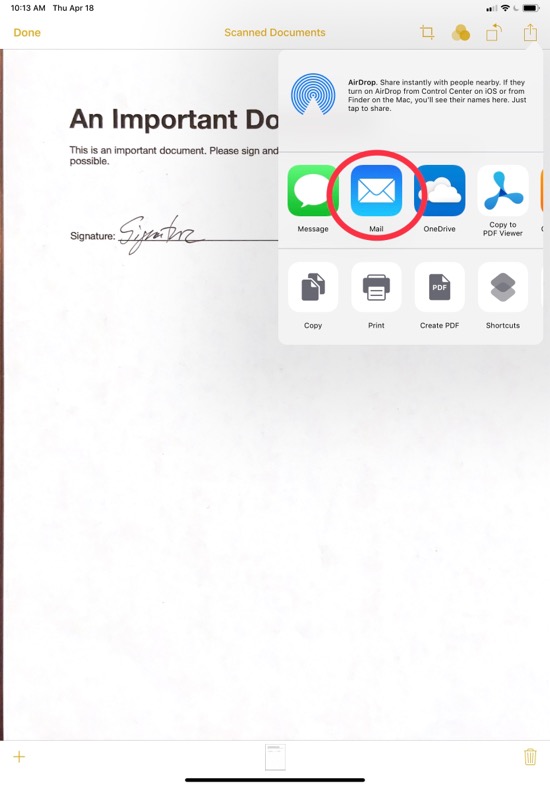
To email your scanned document, tap on it to open:
Tap the Share button at the top, then tap Mail:
Then fill out the email and send it.
You can also send your scan via Messages or to other apps that are listed in the Share Sheet.
Save or Remove
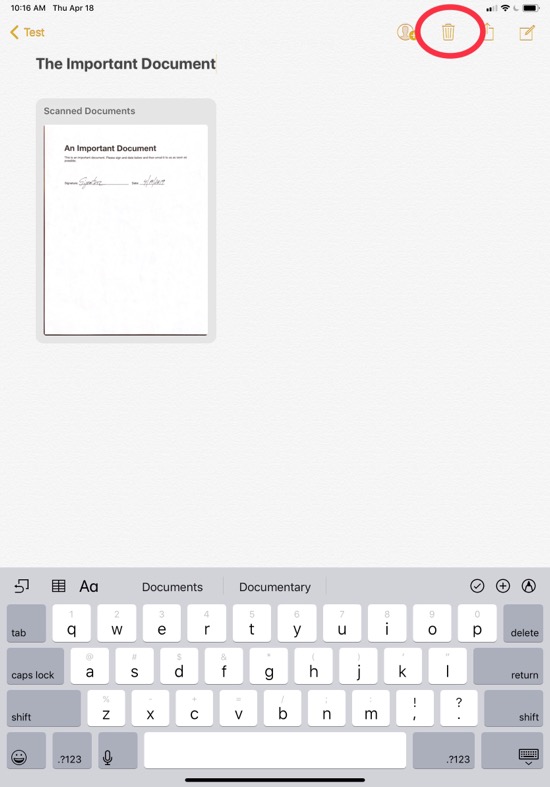
When you’re finished sending the document, tap Done:

You can keep your scanned document in the Notes app in case you might need it again or want to retain it for your records. If you do, I suggest adding a title to the top of the note so you can more easily find it later:

If you don’t want to keep the scanned document, tap the delete button, which looks like a trash can:
Signed and Sent!
These techniques work on both an iPad or iPhone, though if you’re using an iPhone, you might need to rotate it so that you can better see the document. I hope this article helps you more easily deal with both digital and paper documents. I plan to cover more about PDFs and managing files in future articles, so stay tuned.
SHARING
If you find these articles useful and know of others that might as well, use the buttons below to share this article using social media or email.
Cover photo by Cytonn Photography on Unsplash*


I didn’t know about the scan feature in Notes. Awesome Rob.
LikeLiked by 1 person